What's a Gif?
A gif is technically defined as "a lossless format for image files that supports both animated and static images," but these days on the internet you usually see it as meaning "an animated image." GIFs (which stands for Graphics Interchange Format) are used in all corners of the internet and are becoming increasingly more accepted. They can be made in a lot of ways, but this guide is specifically for creating GIFs using photoshop!
Steps to Come
Needed

Setting Up Your Document
Before you begin the set up of your document, make sure to have your images that you want to use. In this method, I'm using automatically generated screenshots from a video. If you're using convert to video frames, use your own steps for the start-up of this tutorial.
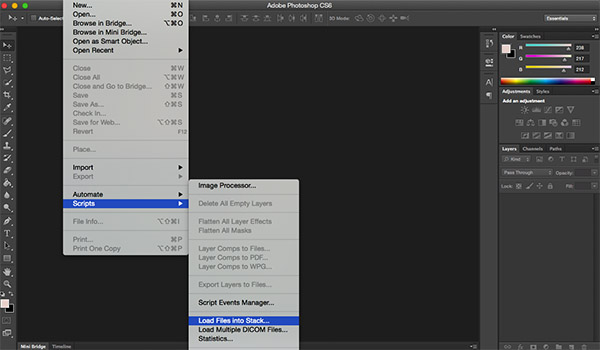
File > Load Into Stack
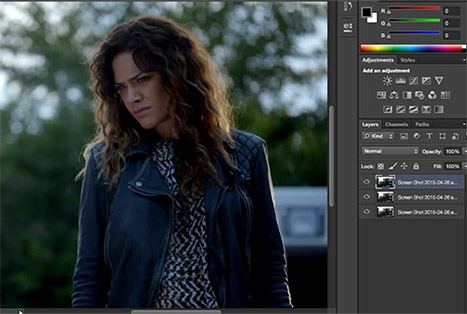
To start with, load the images into a stack (see image) and wait for photoshop to run its magic. When it's done, all of your selected images will be in the same file, with each image as a layer. You can load into a stack through a folder or through individual files.
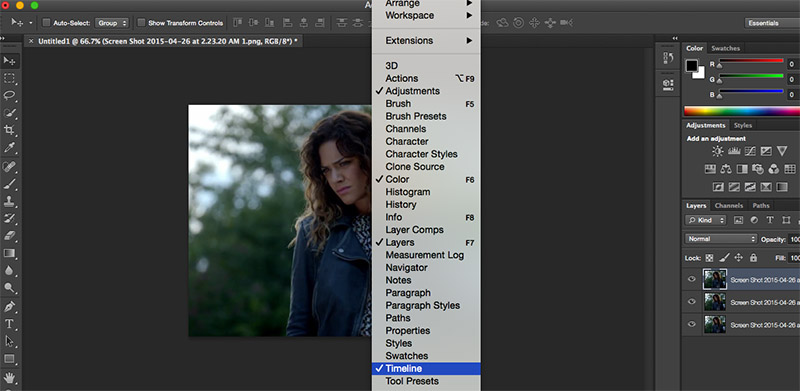
The Gifstorical Timeline, Window > Timeline
Before you can start animating a GIF, you need to make sure to pop out the timeline, or else you won't have any contol over your animation frames. In older versions of photoshop, the timeline is called animation. The timeline allows you to control your animation frames, as well as a photoshop video timeline which isn't as useful as a program that's solely dedicated to video editing, but we'll look at that later, too.
Editing Your GIF
Everyone's favorite part is editing the GIF, so we'll definitely need to look at that! Everything needs to be on top of the frame animation panels. If it isn't, then it won't affect all of the layers (or frames) of the GIF. Some things (in the form of layer adjustments) that you might consider are: color balance, vibrance settings, hue/saturation.The below image is an example of a layer palette containing non-animation frames.
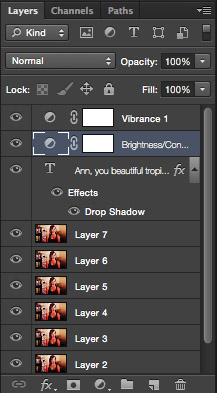
In this particular GIF I decided to add text. For this, I used a quote from a television show. You've probably seen that before; it's a pretty popular trend when it comes to making GIFs. Whether or not you want to do this depends on what your purpose for your GIF is. Sometimes it can be great, but sometimes it can get distracting.

Animating the Layers
If you remember the steps before, where we opened the timeline (window - timeline), then you're on the right track. Next you have to switch from "video timeline" to "frame animation" by clicking on the button in the menu.

Shift and select your layers and then make your frames into layers by selecting the context menu in the corner of the timeline menu. After you do this, your layers should be converted into their own animation frames on the timeline.
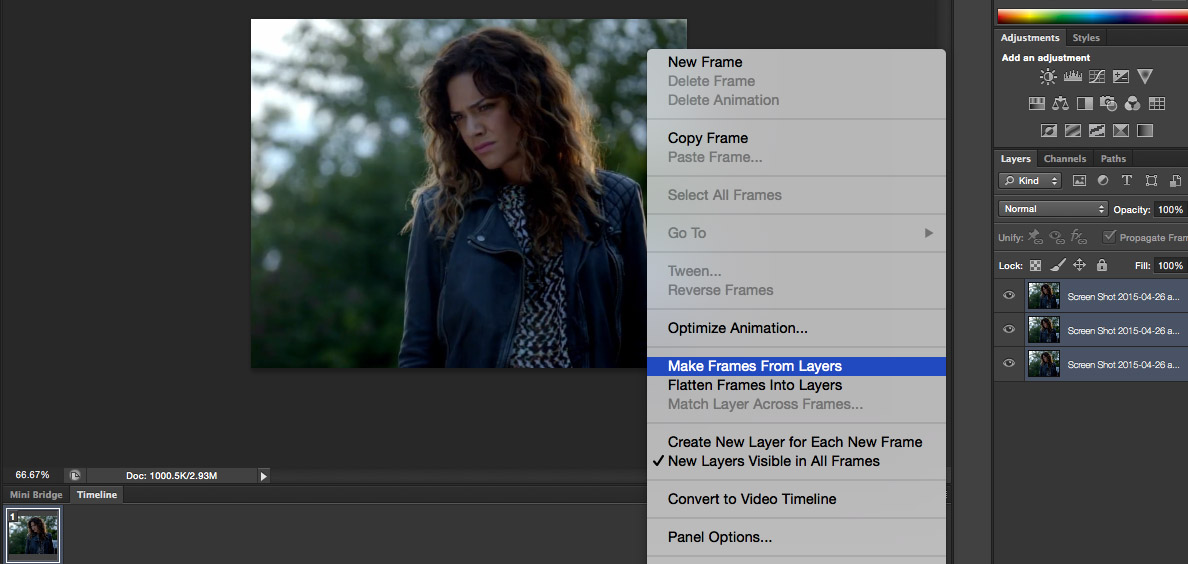

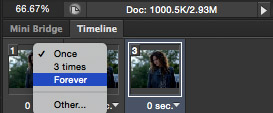
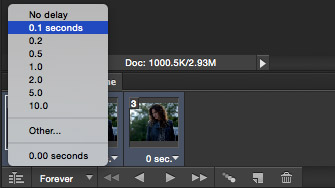
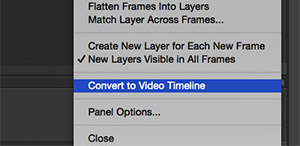
Set your repeating away from "once" to "forever," or else your image will only loop once. Then, set your timing to whatever is suitable for your GIF. Sometimes "no delay" works best, while other times anywhere from 0.2 seconds to 0.3 seconds can be used for timing. If you're editing an already created GIF, leave this setting alone. The below images show the next steps: loop forever, time between frames, and convert to video timeline. Convert to video timeline is optional; you could save your GIF right now and you'd be done! But if you select all of your frames in your animation and convert it to video timeline, you can sharpen your GIF.
Saving Your Work
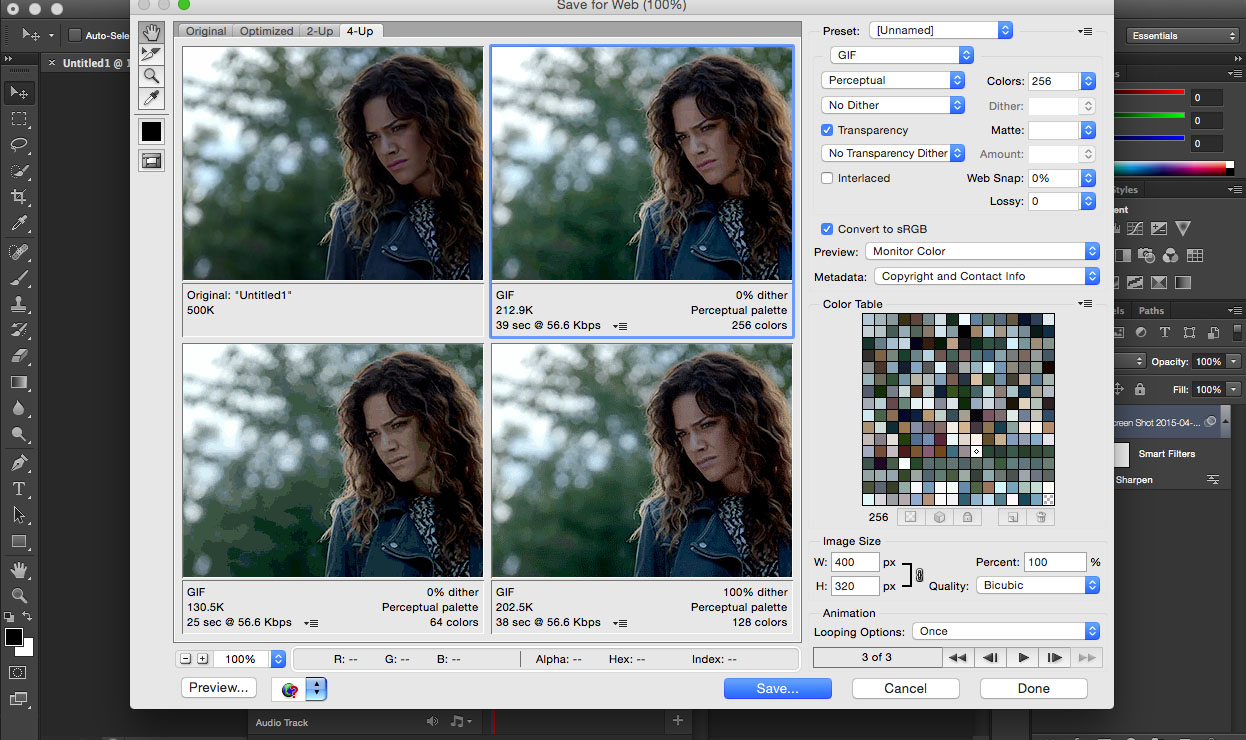
If you save your work like you usually would (save as), then you're not going to get an option to save your work as a GIF like you need. After using File > Save for Web, you see an optimized dialog box. Here you can take down the amount of colors featured in the GIF and try to reduce your file size. But like I warned before, GIFs tend to have large file sizes, and reduction of the file size comes with a reduction of gif quality. Make sure that your looping options are saved with "forever" or it'll only loop once!
